Drop Alignment
I have been asked a few times about how I manage to align my falling drops from so many different solenoids. Apart from the fact that the solenoid head I have makes it very accurate I have a system which I think is probably a bit different that some do. My drop stand has 1 centre nozzle and 5 surrounding it but I always make the centre drop the last drop into the collision. Maybe it is of interest to some, and it may even help someone.
For me, the advantage of this method is that no re-alignment is required because the centre drop is always going to fall straight down onto the S.F.B. jet and collision with the benefit of gravity. When the centre drop is released first the force of the S.F.B. may change for each collision shape – or even deviate slightly. It is also highly likely that if the side drops are added later the height of the S.F.B. jet is increased so that means the angle of the side solenoids may need to be increased in an attempt to get the side drops on top and because of the speed that the S.F.B. rises it may not be possible to have enough time to get the side drops arced and be falling straight down onto the collision. I believe that this is why a number of collisions capture the side drop hitting the side of the collision.
Regardless of which method you decide to use to create a collision, good luck and hopefully you get some stunning captures.
Step 1.
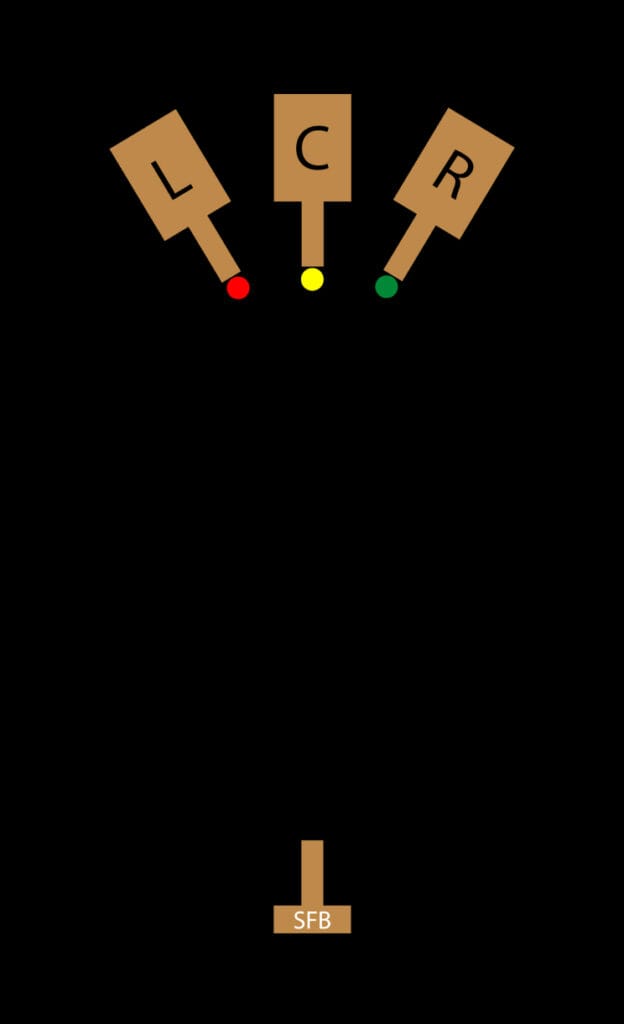
Start by having all solenoids OFF.
I always start with 100ms delay for all solenoids. If you are only using 1 solenoid above this is really not relevant because you can use the flash delay to “tweak” the capture time, but when you have multiple solenoids, changing the flash delay will affect all solenoids so by having that 100ms delay you can decrease it to speed up the release of the drop without affecting the others (and your desired collision point)
Step 2.
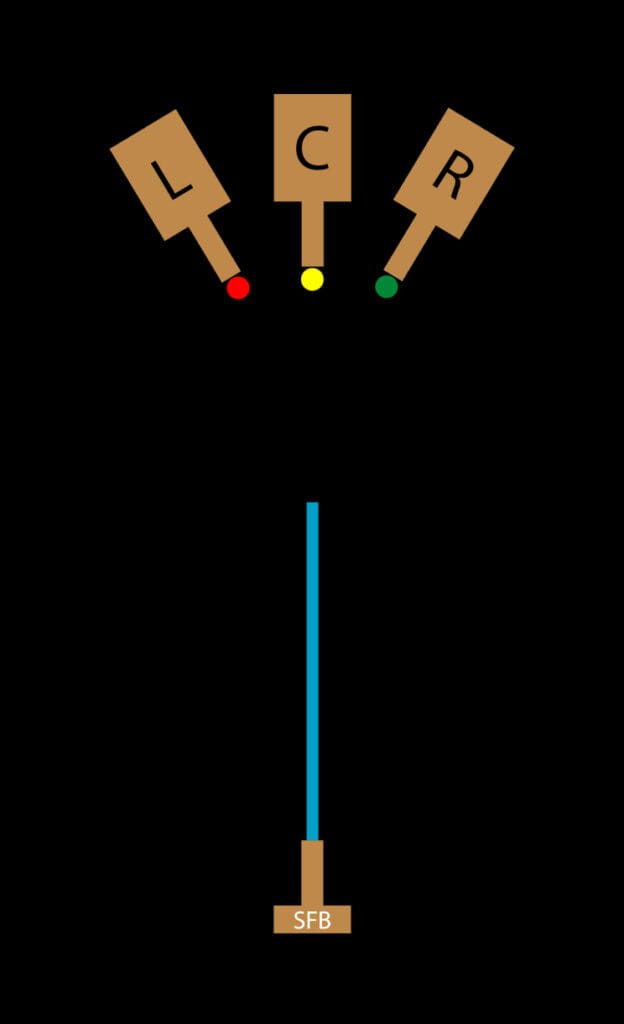
Activate just the S.F.B. Then adjust timing and pressure to get the jet high enough to be involved in all of the eventual collision. This establishes your appropriate flash delay.
I just use the rise and fall of the liquid jet to establish a true perpendicular jet. I have found that even if you use some sort of levelling device on the nozzle, the jet could still be off-line due to possibly a burr in the nozzle or maybe even some debris in the liquid.

Step 3.
Following on from Step 2 – once the S.F.B. jet falls straight back down onto the S.F.B. nozzle I am happy that the jet is perpendicular
Turn OFF the S.F.B. so that all solenoids are now OFF.
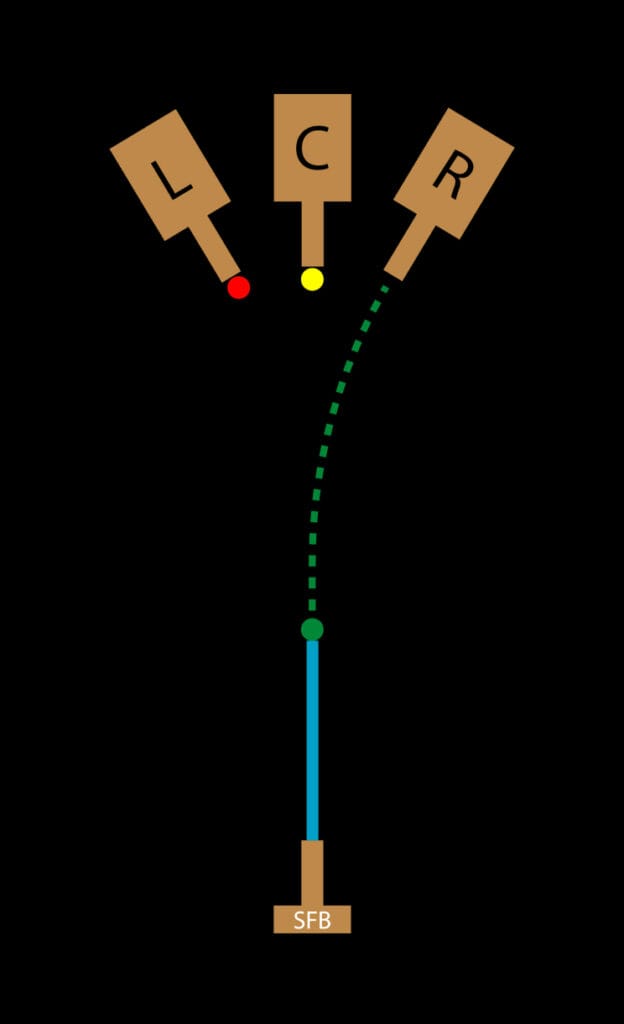
Step 4.
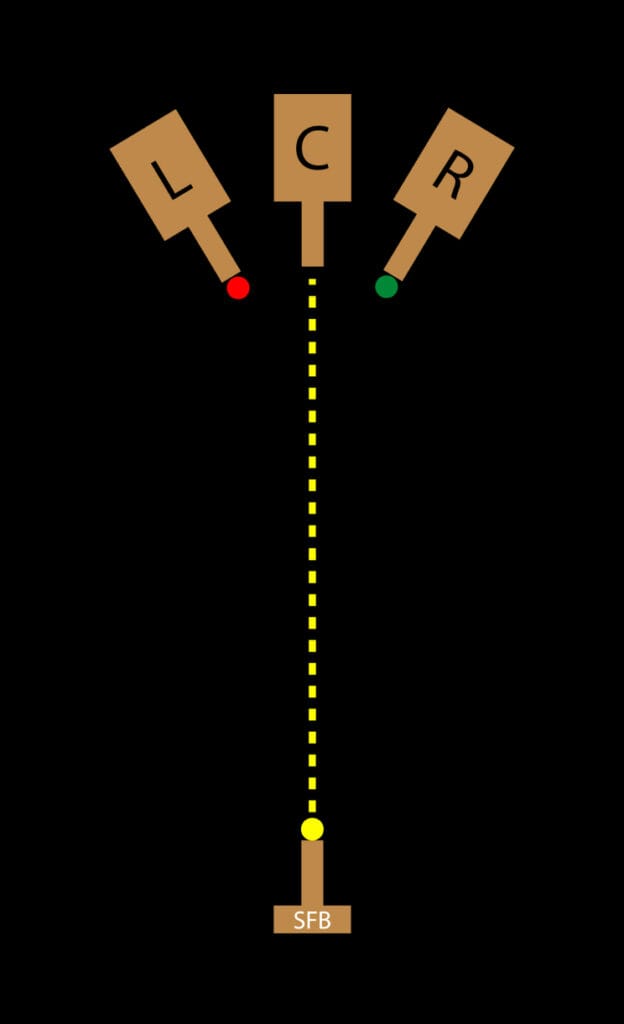
Turn ON just centre solenoid and using a falling drop align the S.F.B. so that the drop from the centre solenoid is landing directly onto the S.F.B. nozzle.
Still just using a single centre drop and without changing your flash delay adjust your sync or time delay so that when the flash activates (established in Step 2.) the single centre drop is sitting on top of the S.F.B. nozzle.
(At this stage you can also zoom in on image to check the alignment from step 2.)

Step 5.
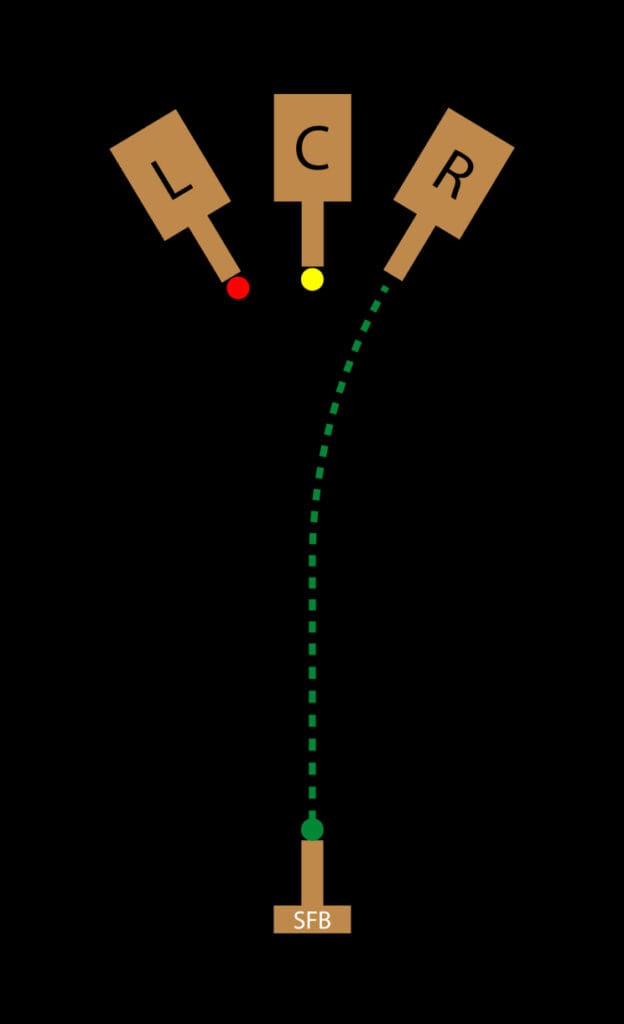
Turn OFF centre solenoid and activate left solenoid only. Do not alter flash delay or move S.F.B.
Create 1 small falling drop and adjust by eye until you see the drop land on S.F.B. nozzle. Then use camera to capture image making any minor adjustment to the left nozzle and the delay time so that the drop is captured just sitting on S.F.B. nozzle.
Step 6.
Turn OFF left solenoid and then turn ON right solenoid and basically repeat the same procedure as Step 5.
Leave right solenoid ON for next step.
Step 7.
At this stage we have all drops being captured sitting on top of the S.F.B.
Without altering your flash time alter (probably increase) the initial delay to capture the falling right drop at a higher position.
Now also turn ON S.F.B. to confirm you are capturing a collision . Once you have done that turn OFF S.F.B. but leave the right solenoid ON.

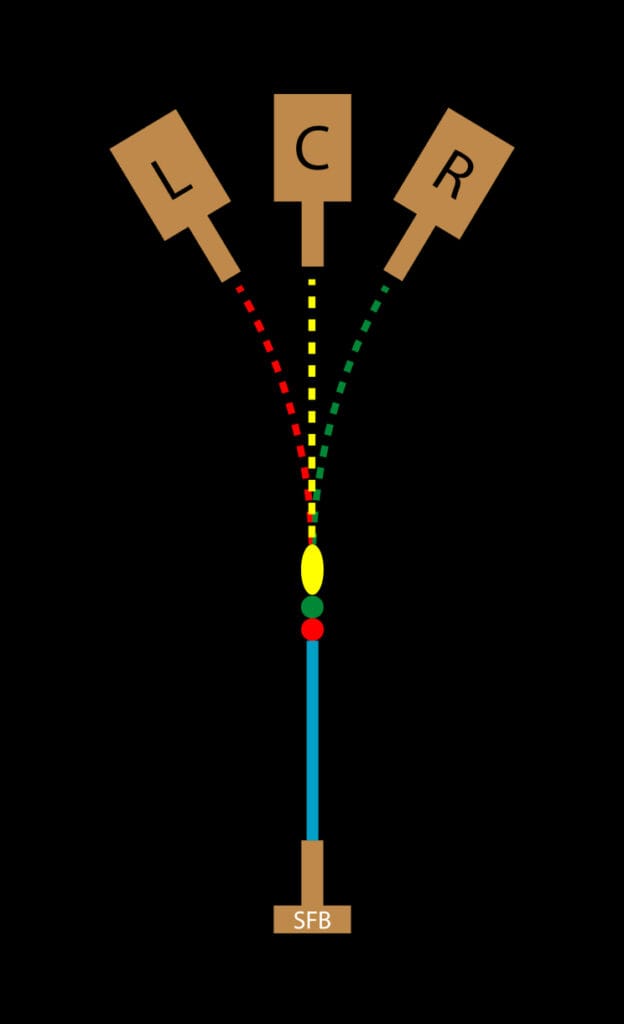
Step 8.
Now turn ON left solenoid as well as right solenoid. I start by changing the left delay to same as what was made to right solenoid in Step 7. For now, keep S.F.B. OFF.
So with only left & right solenoid releasing 1 drop each you should be capturing both drops very close to each other. Adjust the delay of either one if you want to get one drop above the other.
Turn ON S.F.B. to confirm collision is still where you want. Consider adjusting S.F.B. pressure as needed.
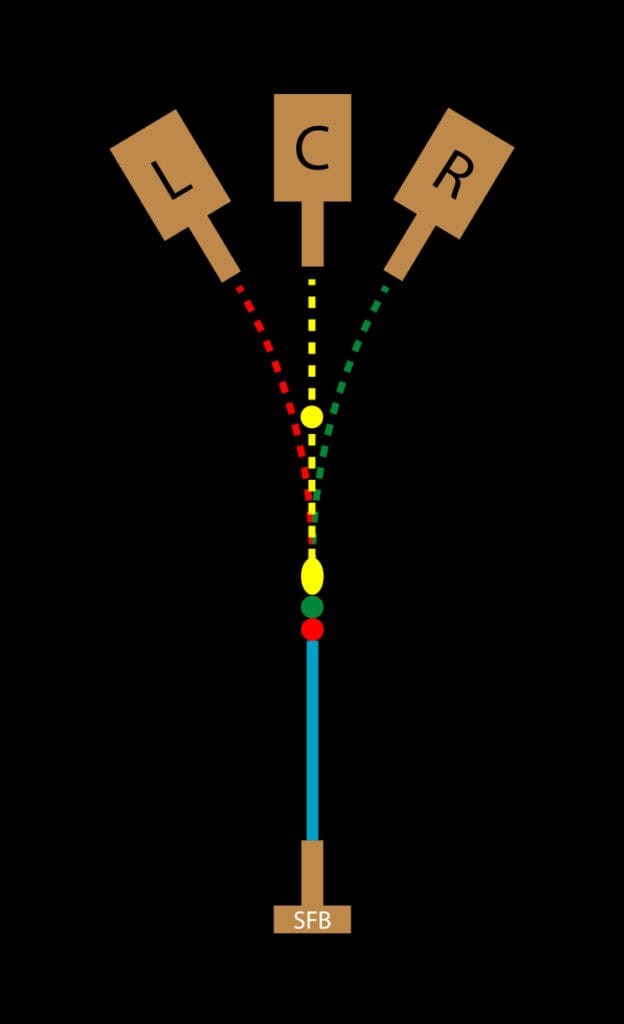
Step 9.
Finally time to release a centre drop!
Turn ON all 3 top solenoids but leave S.F.B. OFF for the moment. Adjust the delay of the centre solenoid similar to the outer solenoids. Fine tune the adjustment using captured image. Your goal is to have the centre drop above the other drops. I usually also make it a larger drop.
Turn ON S.F.B. and confirm the collision.
Step 10.
It really is just now fine tuning. Maybe make the centre drop big enough to split into 2 drops or even create a longer drip but keep the centre drop as the top drop
Your alignment should remain fairly close. You will probably find you need to increase the height or pressure of the S.F.B. to get it to push through the falling drops.