D.I.Y. Fountain Assembly

I have designed this fountain nozzle setup with the intention of making these designs freely available for whoever would like to have a try at this genre of water drop photography. There is a reasonable amount of work involved in the printing and assembling of the fountain, but personally, I enjoy the “tinkering” aspect and enjoy the various shapes that these types of fountains produce.
I realise that not a lot of people will have a 3D printer but these files may be useful for those that do have one but are unable to do their own designs. Where I live, in Australia, public libraries will print your designs for a minimal cost to cover materials. I have included a breakdown of the parts required so that you can make an informed decision about making your own fountain system.
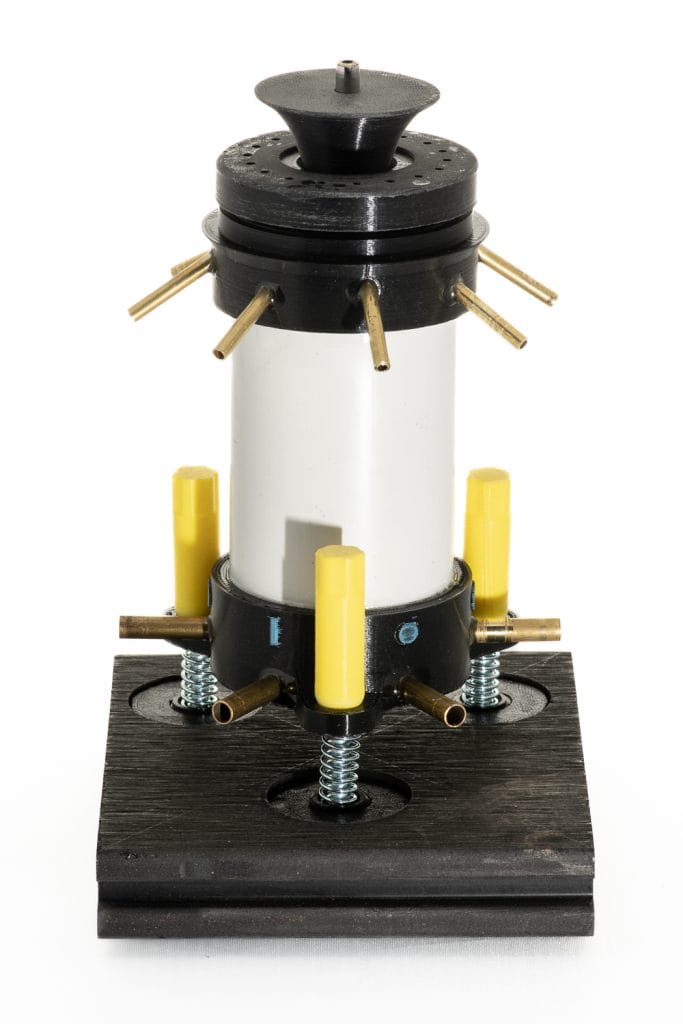
This fountain has an inner and outer nozzle, each with their own liquid supply. There is also a 4mm I.D. S.F.B. (Shoot From Below) jet. Both the inner and outer nozzle have their own liquid chamber which each have their own air distributor at the base. A timed blast of compressed air will force the liquid out of the top of the fountain (like a garden sprinkler).
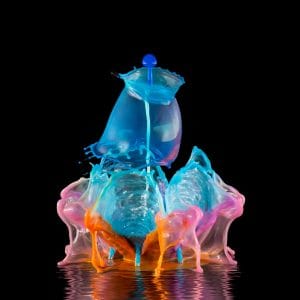
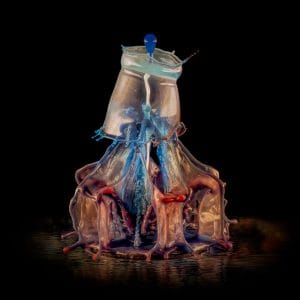
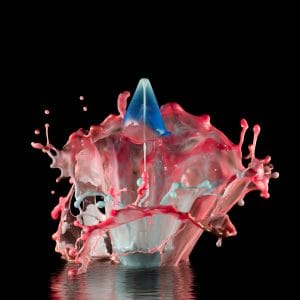
The various centre nozzle designs make a shape as the liquid flows over its outer surface. The shape of the “fan” will depend on various factors, such as how much fluid you top up the chamber with between each capture. How far the nozzle is screwed in or out. The viscosity of the liquid and of course the same factors that determine the SFB jet, pressure and timings. The outer nozzle works by creating a shape as the liquid is forced out of the top openings in the nozzle. These may be in form of holes, fan, spokes or spiral. I have included some samples photographs of the different shapes that can be created by “mix and matching” various inner and outer designs.
The liquid chambers are filled via the top 4 inlet tubes for each chamber. You only need to use one for each chamber, but I have included 3 extras for each chamber simply to provide the ability to add a small amount of different colours that will “sit” around the top of the base colour. This method makes it quick and easy to experiment with various colour combinations. Any unused inlets will need to be capped. I just use a small length of silicone tubing folded over at the end and zipped tied or a quick connect plug.
At the base is 4 brass inlet tubes. This is where you connect the pressurised air for both the inner and outer liquid chambers. (each controlled via own solenoid). The outer air has 2 inlets just in case you wish to balance the inlet air flow for the larger diameter outer nozzle. The smaller inner chamber only has 1 inlet. The final brass inlet is for the pressurised SFB jet. At a minimum, when using this fountain, you will need to use at least 3 of the lower 6mm inlets and 2 of the top 4mm inlets. The rest is just for how creative you choose to be.
Another feature is the addition of 3 adjustable feet which allows exact vertical alignment of the SFB jet. I have included designs for feet that can be secured to a base of your choice and then you could temporarily secure that setup to your tray if you really want to secure the fountain. After I had printed my test fountain, I decided to add a threaded collar which I simply glued on top of the ledge near the top of the fountain. This allowed me to mount the fountain into my tray and have all the hose connections hidden and use my existing tray adjustment to align the SFB. (The original reason for including the ledge was in case you wished to sit a thin piece of acrylic around the fountain to hide the hoses and maybe capture some reflections). I used 4mm O.D. at the top for the coloured liquid inlets, but then “converted” them to 6mm O.D. by simply sliding on some 6mm pneumatic tubing. This allowed me to use the quick connect fittings that I had available.
The inner and outer walls of the fountain body are created using cut sections of PVC pipe therefore I have included a printable tester that will allow you to check that the dimensions of your locally available pipes are suitable. If you need to make changes and can work with the design files you could change the measurements, alternatively, I have also included files for printing the tubes if you are unable to use PVC pipe.
I realise that there is a fair amount of work involved in the preparation and assembly of the fountain but it might be an interesting project for some and it gives you an opportunity to create some new designs by simply adding a couple fountain combinations to your SFB. The cost of printing all the fountain parts including a full range of nozzles was under US$5 (Obviously there would be additional cost if you had to out-source the printing or have to print the main tubes). I had most of the other “bits and pieces” but I estimate that if I had to purchase all the materials the full cost of the complete fountain including the 3D print would be less than US$20. However, this fountain assembly would require a total of 3 solenoids plus whatever you use for the top drops and tubing connections.
Sample Images


